About La Coiffeuse

I'm a 26 year old living in the suburbs of DC. These are my stories about finding Mr. Right in all the wrong places. *cheers*

Thursday, April 26, 2012

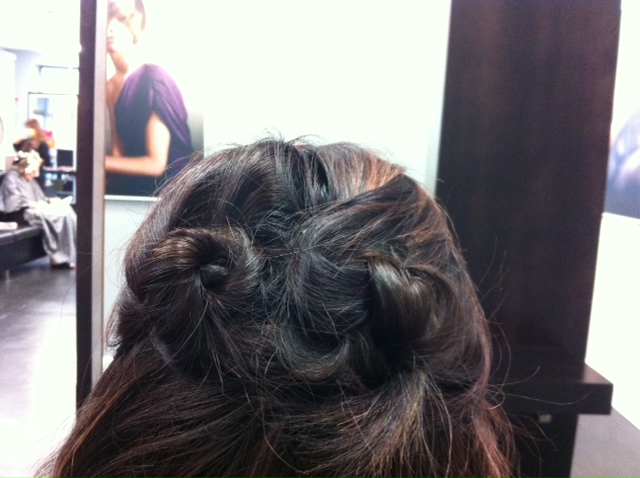
5 Minute Twisted Updo

My apologies about not being able to post about ombre as promised yesterday. Surprisingly, my day off turned into one of the busiest days ever. And on top of busy Wednesday- I keep wanting to add to the post, and changing things around. I will post about ombre VERY soon (as in tonight with Day 18's hair-do), I pinky swear.

Yesterday's look is a 5 minute up-do, perfect for any occasion. Quick & simple. You can dress it up or down. I paired my up-do yesterday with a grey J.Crew V-neck (is anyone else obsessed with J.Crew v-necks too? They are soooooo comfy) and skinny jeans. But pair it with a LBD- and you've turned into little Miss Posh.

Day Dix-Sept
5 Minute Twisted Updo
Products Used: Aveda Damade Remedy Daily Hair Repair
Moroccanoil Luminous Hairspray
Tools Used: 2 Clear Elastic Bands + Bobby Pins
How-To: Using clear elastic bands, tie hair into to pigtails.
Take pigtail and twist.
Take twisted pigtail and roll into a bun.
Using bobby pins, pin bun into place.
(Do on both sides)
Finish with Luminous Hairspray.
Your twisted buns shouldn't look perfect. Remember,
we're staying away from Princess Leila buns.
Having pieces falling out gives your buns a looser look.

Tuesday, April 24, 2012

Side Twist Poof

I finally know how my clients feel when they're in my chair telling me, "Nina, I can't take it anymore. Just cut it off. I'm SO over this awkward stage. I don't give rat's ass about how long it is!" And this when I grab my pom-poms and cheer them on. "Oh come on! You've come this far! Don't give up now!" Well ... I need 100 cheerleaders. Meh ...

Day 16 is a hybrid between Day 5 & Day 7.
Day Seize
Side Twist Poof
Products Used: Pureology Strengthening Control Hairspray
Tools Used: Flat Iron + Bobby Pins
How To: After Curling Hair, take 2 inch section from side part.
Twist hair once, and push up to create desire "poof" height.
Conceal bobby pin in place.
Finish with Strengthening Control Hairspray.
See you tomorrow for ombre talk over tea. :)

Monday, April 23, 2012

Half way through ...

Woo-hoo!! Day 15 is here! Half way through my challenge. HELL YEA! If I can make it through this 30 day challenge successfully, I debating on whether or not to put in extensions. Just a thought.

Day Quinze
Double Braid
Products Used: Pureology Pure Volume Thickening Spray (On towel-dry hair)
Wella Stay Firm Finishing Spray
It's a 10 Miracle Oil Plus Keratin
Tools Used: Flat Iron to Curl + Bobby Pins
How-To: After curling hair, see Day Quatre
Use It's a 10 Miracle Oil to soothe ends.
Part hair down the middle. (It's been YEARS since I've done a middle part.
And I have to say, I still dig it.)
Take 1/2 inch section on each side & braid.
Conceal bobby pin into braid to hold in place.
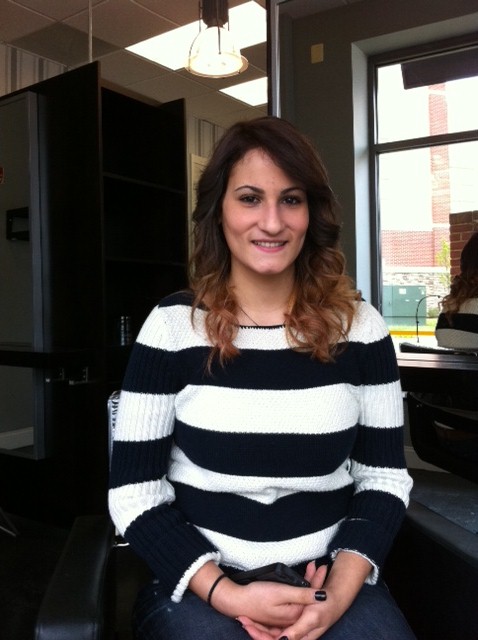
I was going to wait to post this picture along with my ombre post (that I'm currently putting together.) But I'm so excited I want to share it right away. Our lovely receptionist, Amanda wanted the ombre and yours truly did the honors today.


Be sure to stay tuned for Wednesday's post about ombre ladies & gents.

Sunday, April 22, 2012

Ready for Monday ...

Woah, I can't believe how fast the weekend went by. I said on Friday that I'd post sometime over the weekend and the next thing I know it's Sunday night and I'm 3 blog posts behind. Time flies when your hair is having fun. :)

Day Douze
Preppy Prepster
Products Used: Moroccanoil Luminous Hairspray
Tools Used: Round Brush + Dryer + Flat Iron (Optional) + Teasing Brush + Bow Headband
How-To: After blowing out your hair straight (see The Classic),
use teasing brush to tease hair at the crown and down to ears.
Use teasing brush to soothe down tease.
Place headband into place.
Putting headband in will create more height to what you
have teased. Soothe down with teasing brush to desired height.
Finish with Moroccanoil Luminous Hairspray.
I loved this hairstyle!
I felt so flirty, preppy, cute! (and oh-so humble.)
Day 12 brought wonderful news. Last month, I went in for an audition with Wella to become a Color Educator Training Specialist-- which means I would get the opportunity to go teach color trends and techniques in different salons. I would get to travel to the Wella studios in NYC & LA to train. And on Friday, I got the call saying that I got the job! *high five, down low* I will still be at the salon full-time but at the same time have this opportunity to learn & grow in my career. So the fun hairstyle definitely made the day so much better! I'll be sure to update about the job. :)

Day Treize
Faux Shave
Products Used: Wella Stay Firm Finishing Spray
Alterna Caviar Anti-Aging Polishing Serum
Tools Used: Round Brush +Dryer + Flat Iron (Optional) + Bobby Pins
How-To: Follow Steps to The Classic.Push one side of hair back, and pin back with bobby pin.
Finish with Wella Finishing Spray.
Use a bit of Polishing Serum to give ends a sleek shiny look.
Last summer, I shaved a bit from the left of my hair. I was feeling very adventurous and wanted something fabulous and edgy ...
It was always one of my favorite hair styles, and I've contemplated on shaving the side again. Thoughts?

Rain rain go away ... what a crappy Sunday ...
Rainy Sunday from the Salon

With the rain, I wanted to do a hairstyle that didn't require
much styling and would be rain proof.


Day Quatorze
Sweetheart Braid
Products Used: Moroccanoil Luminous Hairspray
Tools Used: 2 Clear Elastic Bands + Bobby Pins
How-To: One of my favorite hair bloggers, Hair Dresser on Fire
I love following beauty & hair blogs because I
am ALWAYS up for learning new things from
talented stylists.
Sweetheard Braid Tutorial


Photo Credit
So my sweetheart braid looks NOTHING like HDOF. (It didn't even look like a heart.) My layers are so short that braiding my hair into 2 hairs was a challenge itself. After I followed the steps, I ended up with a twisty- half updo. Hey, I thought it was cute ...

I have tons planned for the blog this upcoming week ... Stay posted! Have any questions or something you'd like to see blogged about? I'd love to hear your ideas!

Thursday, April 19, 2012

Braid, Braid, Braid

ARRRGHHH! I am getting a tad frustrated with my hair. It's only been 11 days and I hate my hair. I thought about getting hair extensions, but hello that beats the purpose of a 30 Day Hair Challenge. If I got extensions, it'd just be a "30 Days, 30 Different Hair Styles" blog. (But boy would that have been easier.)

Day Onze
Braid Me
Products Used: Aveda Damage Remedy Daily Hair Repair
It's a 10 Miracle Shine Spray with Noni Oil
Tools Used: Round Brush + Dryer + Flat Iron + Bobby Pins
I didn't use any finishing sprays today,
because I wanted a a very soft look.
How-To: The Nina Classic, see here.
From part, take one section and braid to the side.
Hide bobby pin back into the braid to secure.


If any of you are like me, you're visual learners.
So there is no way you can figure out how to do a side braid
without a tutorial.
Stay posted for a tutorial of how-to do
a side bride!

Wednesday, April 18, 2012

Side Pony

I'm keeping this post on the shorter side because I have to be up at 6am and it's currently 12:45. *Groans*
Yesterday's classic pony tail was my inspiration for today's style.

Day Dix
Wavy Side Pony
Products Used: Moroccan Oil Luminous Hairspray
It's a 10 Miracle Shine Spray with Noni Oil
I love It's a 10 Miracle Shine Spray because it doesn't leave
the hair greasy or heavy. It's a dry oil spray, just to give enough
shine, but not to weigh the hair down.
Tools Used: Flat Iron + Small Clear Elastic Band
How-To: Curl hair with any curling tool preferred. See Day Quatre Post. (I use a flat iron.)
After hair is curled, run fingers through hair and
lightly spray shine spray to loosen curl.
Using a clear elastic band, loosely tie hair off to the side.
Pick pieces to leave out. (The looser, more messy, the better.)
Finish with Luminous Hair Spray.


Tuesday, April 17, 2012

The Great Bobby Pin

Before I go into full explanation as to why I believe the bobby pin is the greatest invention since the wheel- here's today's look.
Day Neuf
The Classic Pony
Can't go wrong with a classic pony
with an oh-so cute gold bow headband.
Products Used: Moroccan Oil Luminous Hairspray
(If you haven't caught on yet, I'm in love with the Luminous Hairspray.)
Tools Used: Teasing Comb + Small Clear Elastic Band + Bobby Pins + Headband (Optional)
How-To: After blowing out hair, use teasing comb to give slight
lift at the crown area. (I personally don't like too much height when I'm
doing a ponytail- but to each it's own.)
Using clear elastic band, tie hair into ponytail.
Wrap a little section of hair around elastic to hide elastic band.
Secure with bobby pins.
Using a teasing comb, tease ponytail about 1/4 inch section at a time
to give the pony some fluff.
Finish with Luminous Hairspray. Add headband.

Okay ladies & gentleman ... I would like to present to you the greatest invention ever invented in mankind.
Le Bobby Pin
Yes, something so small and simple-but performs miracles. Yet many of my clients complain about not knowing how to use them or that they "don't work right." They are my favorite tool, and if I was stuck on a island and could only have a certain number of objects with me ... you can bet your last dollar I'd have a pound of bobby pins.

Bobby Pin 101-
Photo Credit
  • Bobby pins come in all different colors. Black, brown, silver, gold, pink, blue, etc. Don't worry too much about matching the bobby pin color to your hair color. As long as you know how to hide a bobby pin, you don't have to worry much about matching it to the color of your hair. I once had a client that had grey hair insist that I only use silver bobby pins on her. It took much reassuring and an up-do later to show her that brown bobby pins can be hidden in her grey hair. I like the standard dark brown bobby pin that I buy by the pound.


  • Unless you want to visit your dentist more often, don't use your teeth to open a bobby pin. Bobby pins aren't necessarily meant to be opened. They are meant to stay closed and be slid into the hair. Of course there's always an exception to every rule. Sometimes you may need to open a bobby pin slightly. But if you do need to do so, don't use your teeth. What will happen is when you use your teeth to open a bobby pin, it'll stretch the bobby pin too much and then it'll serve no purpose. I hate seeing hairstylist using their mouths to open bobby pins or as a place to keep bobby pins. Come on, clients do not want spit all over the bobby pin you're about to stick into their hair. And let's be real ... no one looks cute doing it. 
Photo Credit
  •  If you need space in-between the pin, opt for hair pins. They have move space in-between and can be slid into place.
Photo Credit
  •  Learn how to hide a bobby pin. Let's face it, we have all seen it ... the super cute side braid or twist with the huge bobby pin at the end of it that makes the hair stick straight out. I came across this blog post on the Beauty Department blog the other day, and couldn't have said it better myself. (Btw- Love you Lauren Conrad! If you need another person to work on your beauty team .. call me!)
  • Less is more. You don't need 50 bobby pins every time you put your hair up. You'll end up with a headache and a up-do that falls. Pin only what you need pinned. Don't put a bobby pin in for the sake of putting a bobby pin in, because next thing you know- you'll have so many bobby pins in, you won't be able to stick the actual bobby pin you need in.